


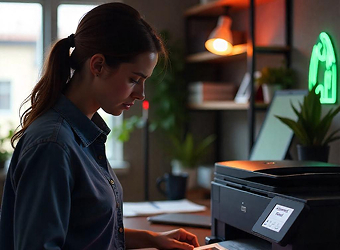
Prints Look Off? Align and Sharpen Like a Boss
Does your printer leave lines out, print text off-center, or deliver blurry images? These issues usually point to misalignment or degraded print quality. The good news? You don’t need to be an expert to fix them.
In this guide, we’ll show you how to identify, fix, and prevent print quality and alignment problems—all with simple, step-by-step methods you can try from home.

What Does a Print Alignment or Quality Issue Look Like?
- Crooked or slanted text
- Colors not lining up properly
- Streaks, gaps, or fuzzy areas in print
- Duplicate or overlapping characters
- Faded or uneven color distribution
These problems aren’t just annoying—they can waste ink, paper, and time. Luckily, they’re almost always fixable.
What Causes These Problems?
- Misaligned printhead – Especially after a new cartridge installation.
- Clogged nozzles – Dried ink buildup can block clean ink flow.
- Low or uneven ink levels – May affect how ink is distributed on the page.
- Paper mismatch – Using the wrong type or size of paper for your settings.
- Software settings – Incorrect or outdated printer drivers or settings.
Step-by-Step Fixes to Improve Print Quality
1. Run a Printhead Alignment
Almost all printers have a built-in alignment tool. Access it through the control panel or printer software on your device. This will realign the printheads for cleaner, straighter results.
- Go to Printer Settings > Maintenance > Align Printhead
- Follow the on-screen instructions
- Print a test page to verify results
2. Clean the Printhead
If colors appear patchy or lines are missing, the printhead might be clogged.
- Use your printer’s “Clean Printhead” option under maintenance settings
- Repeat 1–2 times if needed
- Print a nozzle check pattern to confirm improvement
3. Choose the Correct Paper Type
Using glossy photo paper or textured media? Make sure the paper type selected in the print settings matches what you’ve loaded. Incorrect settings can lead to smudges or off-color prints.
4. Update Printer Drivers
Outdated software can cause miscommunications between your device and printer. Visit your printer’s settings and look for firmware or driver updates.
5. Adjust Print Quality Settings
If your prints look grainy or light:
- Go to your print dialog box
- Change print quality to “High” or “Best” for sharper results
- For everyday documents, “Standard” usually works fine
6. Inspect the Ink Levels
Low ink—especially color ink—can mess with overall quality, even on black-and-white prints. Check your ink levels from the printer display or through your device.
How to Maintain Long-Term Print Quality
- Print something weekly – Keeps the ink flowing and prevents nozzle clogs
- Use quality paper – Lower-grade paper can absorb ink unevenly
- Store paper flat – Prevents curling that can cause jams and skewed printing
- Handle cartridges carefully – Never touch the nozzles or chip contacts
- Keep your printer clean – Dust can enter and affect alignment
Final Thoughts
Fixing alignment and print quality doesn’t have to be complicated. Most issues can be resolved in minutes with the right guidance. The next time your prints look off, walk through these steps before assuming the worst.
We specialize in clear, simple printer guidance for all users. Explore our full blog library to handle other issues like paper jams, slow speed, or Wi-Fi problems—right from home, no service calls needed.
